
For most home espresso setups, a multi-needle WDT tool with a moderate number of needles at a fine diameter is a highly cost-effective upgrade you can make to puck preparation. Mechanical combs such as the AutoComb earn their place in busy café environments where speed and repeatability under volume matter more than fine manual control. The Weiss Distribution Technique, first described by John Weiss on the Home-Barista forum in 2005 and now widely recognized within the Specialty Coffee Association community, addresses the root cause of channeling: uneven coffee density in the portafilter basket.
Quick verdict:
- Best for home use: A branded multi-needle WDT tool (Crema or similar) with 6–8 needles at 0.3–0.4 mm, a magnetic stand, and spare needles included.
- Best budget option: A DIY cork fitted with acupuncture needles (0.3–0.4 mm) costs under $10 and performs comparably to many midrange commercial tools.
- Best for pro/high-throughput use: A mechanical distributor such as the AutoComb, which spins 12 needles and removes barista technique as a variable in busy café settings.
All three options are available to U.S. buyers through specialty retailers and Amazon-style listings. Lyons Den Publishers covers the full evidence base for each below.
Table of Contents
- Which WDT tools are worth buying?
- How to use a WDT tool step by step
- Why WDT helps — and what it cannot fix
- How to choose a WDT tool: specs and red flags
- Cleaning, needle care, and replacement parts
- Do you really need a WDT tool? Evidence and a simple A/B test
- Key Takeaways
- The WDT tool in context: a broader puck-prep perspective
- Deepen your espresso knowledge with Lyons Den Publishers
- Useful sources and further reading
Which WDT tools are worth buying?
The table below covers the three practical categories: a reliable home multi-needle tool, a budget multi-needle option, and a mechanical distributor for professional throughput.

| Criteria | Home multi-needle WDT (e.g., Crema) | Budget / DIY multi-needle | Mechanical distributor (e.g., AutoComb) |
|---|---|---|---|
| Best for | Home baristas wanting a ready-to-use tool | Beginners testing WDT before committing | Café pros needing speed and consistency |
| Needle count / pattern | 6–8 needles, radial pattern | 6–8 acupuncture needles, user-spaced | 12 needles, motor-spun |
| Needle diameter | 0.3–0.4 mm | 0.3–0.4 mm (acupuncture gauge) | Adjustable; fine-gauge stainless |
| Materials and build | Stainless steel needles, machined handle | Acupuncture needles, cork or wood handle | Stainless steel body, motorized mechanism |
| Portafilter compatibility | 51–58 mm baskets | 51–58 mm (needle spacing adjustable) | Up to 58 mm; adjustable depth for standard basket sizes |
| Ease of cleaning | Removable needles; rinse and dry | Needles removable by design; replace cheaply | Wipe-down; needles replaceable |
| Price band | — | Under $10 | — |
| Durability / ratings | Spare needles and magnetic stand common; strong user ratings | Functional but fragile if mishandled | Built for café durability; spare needles included |
| Learning curve | Low; ready out of the box | Low; requires one DIY assembly step | Very low; motor does the work |
Where to buy in the U.S.: Crema-branded tools and similar multi-needle WDT tools are available through specialty coffee retailers and Amazon. The AutoComb ships from Barista Hustle Tools directly. DIY acupuncture needles are available through Amazon or medical supply retailers for under $10.
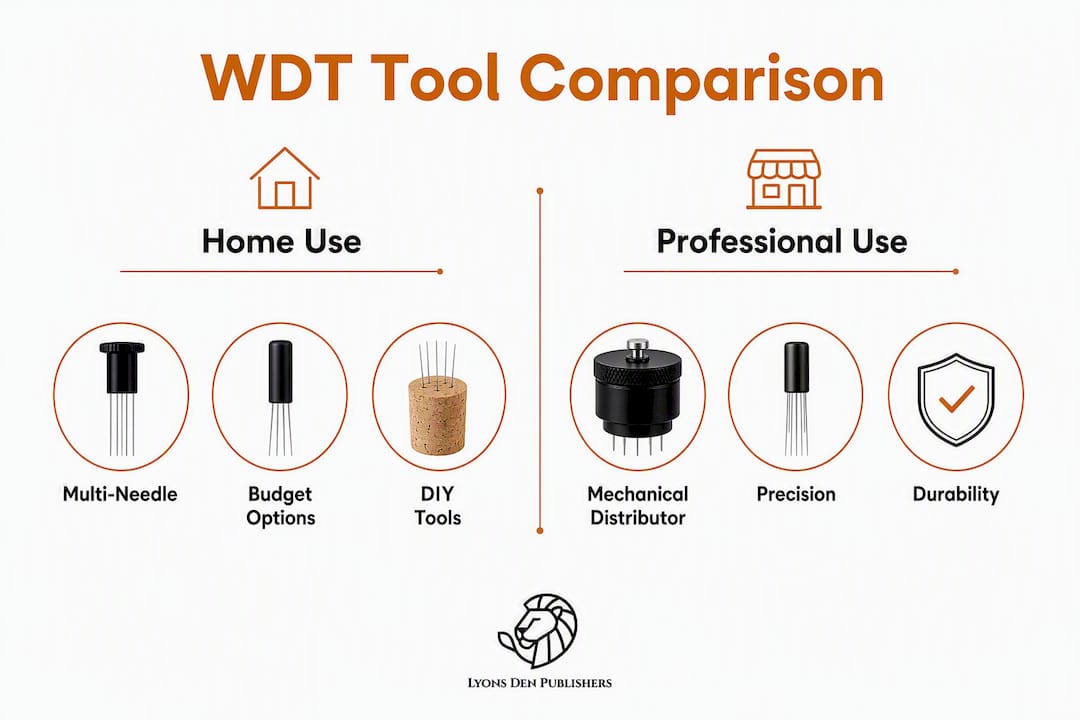
Pros and cons at a glance:
Home multi-needle WDT (Crema and similar):
- Pros: Consistent needle spacing, spare needles often included, magnetic stand protects alignment, strong user reviews on build quality.
- Cons: Costs more than DIY; needle replacement may require ordering from the brand.
Budget / DIY multi-needle:
- Pros: Near-zero cost, functionally equivalent to many commercial tools when needles are correctly spaced, easy to experiment with gauge.
- Cons: Requires assembly, less durable, no stand or storage solution included.
Mechanical distributor (AutoComb):
- Pros: 12 needles, tube of spare needles included, removes wrist-technique variability, fast enough for café throughput.
- Cons: Higher price point, less suited to the slow deliberate workflow most home baristas prefer, overkill for single-group home machines.
Pro Tip: If you are new to WDT, build a cork-and-acupuncture-needle tool first. Spend a week with it, then decide whether the ergonomics of a commercial handle justify the upgrade. Most experienced home baristas find they do.
How to use a WDT tool step by step
The most effective routine takes under 30 seconds: grind into the basket, stir with the WDT tool using a spiral pattern, level the surface, then tamp. Here is the full sequence in detail.
- Dose the coffee. Grind directly into the portafilter basket or a dosing cup. Aim for your target dose weight before stirring.
- Rough-level by hand. Tap the portafilter gently on a flat surface or use a finger to distribute the mound loosely. This is not a precision step; it just prevents grounds from spilling during stirring.
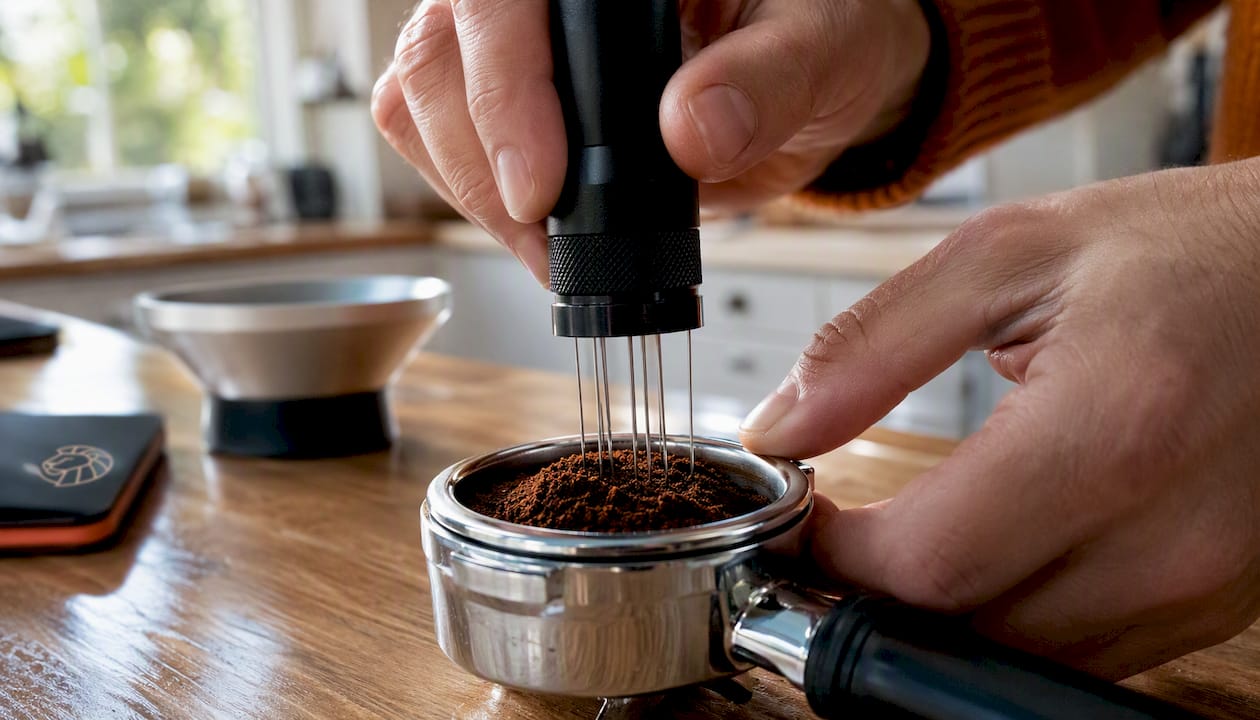
- Insert the needles. Lower the WDT tool into the coffee bed. The needles should reach near the full depth of the puck to break clumps at the bottom layer, but avoid pressing the tips hard against the basket floor.
- Stir with a spiral or figure-eight pattern. Work from the outer edge toward the center, then back out, completing 2–3 full rotations. Keep the motion slow and deliberate; speed creates fines migration, not better distribution.
- Lift cleanly. Withdraw the needles straight up to avoid dragging grounds into ridges.
- Tap or use a distributor. A single light tap on the counter settles the bed. If you use a leveling distributor, apply it now with light pressure to groom the surface.
- Tamp. Apply firm, level pressure. The WDT step has already handled density; tamping now consolidates a uniform bed rather than compressing an uneven one.
- Pull the shot and observe. Watch for even flow from the spout or, on a bottomless portafilter, for symmetrical extraction across the basket face.
Pro Tip: A dosing funnel or dosing cup placed on the portafilter during stirring prevents grounds from scattering off the rim. Silicone dosing funnels sized for 51 mm, 54 mm, and 58 mm baskets are widely available and cost under $15.
Needle depth is the most common mistake. Baristas who only stir the top third of the puck leave the densest clumps at the bottom untouched, and those clumps are exactly where channeling begins. Go deep, move slowly, and lift straight.
Why WDT helps — and what it cannot fix
WDT addresses a specific, measurable problem: coffee grounds clump as they exit the grinder due to static charge and moisture, creating zones of uneven density in the portafilter basket. When pressurized water hits an uneven puck, it follows the path of least resistance through the less-dense zones. That is channeling, and it produces shots that are simultaneously over-extracted in tight zones and under-extracted in loose ones.
What WDT reliably does:
- Breaks up clumps formed by static and moisture during grinding.
- Equalizes density through the full depth of the puck, not just the surface.
- Reduces the frequency and severity of channeling, particularly with grinders that produce clumpy output.
- Improves shot-to-shot repeatability when combined with consistent dosing and tamping.
What WDT cannot do:
- Compensate for a grinder with poor particle size uniformity. WDT distributes what the grinder produces; it cannot correct a bimodal grind distribution.
- Replace correct tamping technique. An uneven tamp after perfect WDT still creates a tilted puck.
- Fix a recipe that is fundamentally off (wrong dose, wrong grind size, wrong water temperature).
- Substitute for a leveling distributor when surface grooming is needed before tamping.
The physics are straightforward. Espresso is brewed at 9 bars of pressure. Water under that pressure will exploit any density gradient in the puck within the first few seconds of the shot. A distributor such as a leveling tool grooms the surface, but it does not reach through the full depth of the bed. WDT does. The two tools perform complementary jobs: WDT mixes through the depth, a leveler grooms the surface, and tamping consolidates the result.
The Specialty Coffee Association's guidance on puck preparation consistently points to distribution as a foundational variable. WDT is one of the most direct ways to control it.
How to choose a WDT tool: specs and red flags
Needle diameter is the single most important specification. The 0.25–0.4 mm range balances stiffness (needles that hold their shape under stirring) with fineness (needles that move through grounds without pushing them). A 0.4 mm needle works well for most home grinders; 0.25 mm suits very fine grinds where thicker needles would displace rather than stir.
Specs checklist before buying:
- Needle diameter: 0.25–0.4 mm (verify in the product listing, not just the photos).
- Needle count: 6–8 for home use; 10–12 for mechanical or pro tools.
- Removable needles: a non-negotiable for cleaning and replacement.
- Material: 304 stainless steel needles preferred for corrosion resistance and food safety.
- Basket compatibility: confirm the tool reaches into 51 mm, 54 mm, or 58 mm baskets depending on your portafilter.
- Stand or storage: a magnetic stand or cap prevents needle bending between uses.
Questions to ask before purchasing:
- What is the exact needle gauge in millimeters? (Listings that only say "fine" without a measurement are a red flag.)
- Are spare needles included, or sold separately?
- Are the needles replaceable by the user, or does the handle need to be returned?
- What is the return or warranty policy if needles arrive bent?
- Does the handle length suit your portafilter depth?
Red flags to avoid:
- Needles thicker than 0.5 mm. These push grounds rather than stir them, worsening uniformity rather than improving it.
- Bulky looped or bent pins. Some low-cost tools use pins bent into loops; these clump grounds around the bend.
- Fixed, non-replaceable needles. Needles bend and break; a tool with no replacement path has a short service life.
- No spare parts or customer support listed. Premium tools include a spare needle tube as standard.
Cleaning, needle care, and replacement parts
A WDT tool that is not cleaned regularly accumulates coffee oils on the needles, which can transfer rancid flavors to subsequent shots. The cleaning routine is simple and takes less than a minute.
After each use:
- Tap the tool gently against a dry cloth or paper towel to dislodge loose grounds.
- Rinse the needles under warm running water.
- Dry fully before storing. Moisture left on stainless steel needles accelerates micro-corrosion at the needle-handle joint.
Weekly or as needed:
- Soak the needle assembly in a small cup of warm water with a drop of unscented dish soap for 5–10 minutes.
- For stubborn oil buildup, an ultrasonic cleaner (the same type used for jewelry) removes residue from needle surfaces without bending them.
- Inspect needles for bends after cleaning. A bent needle distributes unevenly and should be replaced.
Pro Tip: Store the tool needle-down in its magnetic stand or with the cap on. Storing it needle-up in a cup with other tools is the fastest way to bend the tips.
Safety note: Fine needles at 0.3–0.4 mm are sharp enough to puncture skin. Handle the tool by the handle, not the needle cluster. Dispose of broken needles in a sealed rigid container (a capped plastic bottle works) before placing them in the trash.
Replacement parts: Premium tools (Crema and similar) typically include a spare needle tube and sell replacement sets directly. Budget multi-needle tools from Amazon-style listings often do not include spares; replacement acupuncture needles at the same gauge are inexpensive and widely available. Mechanical distributors such as the AutoComb ship with a spare needle tube as standard.
Do you really need a WDT tool? Evidence and a simple A/B test
WDT reliably reduces channeling and improves shot-to-shot repeatability for many home grinders, especially those that produce clumpy output. Mechanical distributors gain favor in high-throughput café settings where removing barista technique as a variable is worth the higher cost.
The evidence base is consistent. Experienced home baristas report near-identical functional performance between well-built DIY cork tools and midrange commercial WDTs, which confirms that needle precision and spacing matter more than handle material or price. The 0.25–0.4 mm needle window is the specification that separates effective tools from ineffective ones, not brand name.
When pros choose mechanical distributors over manual WDT:
- High-volume service (50+ shots per hour) where manual stirring adds meaningful time per drink.
- Multi-barista environments where technique consistency between staff is difficult to enforce.
- Situations where a café wants to standardize puck prep as a documented, repeatable process.
Manual WDT remains the preferred choice for home baristas and specialty-focused professionals who want fine control, low cost, and the ability to adjust needle depth and pattern for different coffees.
A simple A/B test you can run at home:
- Choose one coffee, one dose weight, and one grind setting. Keep all variables fixed.
- Pull three shots without WDT. Note crema behavior, extraction time, and taste (sour/bitter balance). If you have a refractometer, record TDS.
- Pull three shots with WDT using the spiral technique described above. Record the same observations.
- Compare: look for more even crema coverage, fewer blond streaks on a bottomless portafilter, and a more balanced flavor profile.
- If the difference is negligible, check needle depth first. Shallow stirring is the most common reason WDT underperforms.
Most home baristas notice a meaningful difference within the first test session, particularly if their grinder produces visible clumps. The effect is smaller with high-end flat burr grinders that already produce uniform output, but even then, WDT adds a consistency floor that benefits shot-to-shot repeatability.
Commercial WDT tools typically use 6–8 needles for optimal home performance; the AutoComb uses 12 needles for its motorized café workflow. Needle count above 8 offers diminishing returns for manual home use but matters for the speed and coverage a motorized tool requires.
Key Takeaways
A multi-needle WDT tool at 0.3–0.4 mm needle diameter is the most cost-effective single upgrade for home espresso puck preparation, reducing channeling and improving shot-to-shot consistency when used before leveling and tamping.
| Point | Details |
|---|---|
| Choose the right needle gauge | Target 0.3–0.4 mm; thicker pins push grounds rather than stir them. |
| WDT before leveling, then tamp | Stir through the full puck depth first, groom the surface second, tamp last. |
| DIY is a valid starting point | A cork-and-acupuncture-needle tool performs comparably to many midrange commercial WDTs. |
| Mechanical distributors suit pro use | AutoComb-style devices with 12 needles prioritize speed and repeatability for high-volume café settings. |
| Lyons Den Publishers espresso resources | The Lyons Den espresso hub covers complete puck-prep workflows, grinder selection, and extraction science. |
The WDT tool in context: a broader puck-prep perspective
The WDT tool is genuinely useful, but its value depends entirely on where it sits in the preparation chain. Baristas who stir after tamping, or who use WDT as a substitute for consistent dosing, will not see the results the technique promises. The correct order matters: stir with WDT to declump through the full depth of the dose, then apply a leveling distributor to groom the surface, then tamp with even pressure. Each step addresses a different variable, and none of them replaces the others.
What often gets overlooked is that WDT exposes grinder quality rather than hiding it. A grinder that produces highly uniform particles benefits less from WDT than one that clumps heavily. If WDT produces a dramatic improvement in your shots, that is useful diagnostic information: your grinder may be the next investment worth considering, not a fancier distribution tool.
The Weiss Distribution Technique has been part of the home espresso toolkit since 2005, and its durability as a practice reflects something real. It costs almost nothing to try, the physics behind it are sound, and the troubleshooting path for sour or uneven shots almost always leads back to distribution. For readers who want to understand the full extraction science behind puck preparation, The Complete World of Coffee covers the mechanics in depth.
Deepen your espresso knowledge with Lyons Den Publishers

The Lyons Den espresso hub brings together the extraction science, puck-prep workflows, grinder guidance, and sensory evaluation frameworks that sit behind every good shot. It is the natural next step for readers who want to move beyond individual tools and understand the full system: from grind particle distribution to pressure profiling to dialing in a recipe. Keith Lyons's The Complete World of Coffee covers these topics with the same evidence-based depth as this article, in a format built for both home baristas and working professionals. Visit the espresso hub to explore structured learning paths, detailed brewing guides, and resources that connect every step of the preparation chain.
Useful sources and further reading
The following sources informed this article and offer reliable further reading on WDT tools, technique, and espresso puck preparation.
- WDT Tool for Espresso: What It Is and How to Use It — Home Espresso Lab: The most detailed step-by-step how-to in the research pool, including needle depth and stirring pattern guidance.
- WDT Tools: Everything You Need to Know — Coffee Chronicler: Covers the technique's history, the DIY cork approach, and a practical comparison of commercial vs. homemade tools.
- Lyons Den Espresso Hub — Lyons Den Publishers: The Lyons Den Publishers reference for complete espresso workflows, extraction science, and puck-prep guidance from The Complete World of Coffee.